iPhone Photo Editing
– Duplicate Your Photo To Preserve The Original
When you edit a photo in the Photos app, the original image gets replaced by the edited version. However, editing in the Photos app is non-destructive. This means you can undo edits or revert back to the original image at any time. But sometimes you might want to keep the original photo, along with a separate edited version. If so, you can easily duplicate the image before editing.
To duplicate an image, open it in the Photos app and tap the Share icon at the bottom left. Then scroll down and tap Duplicate

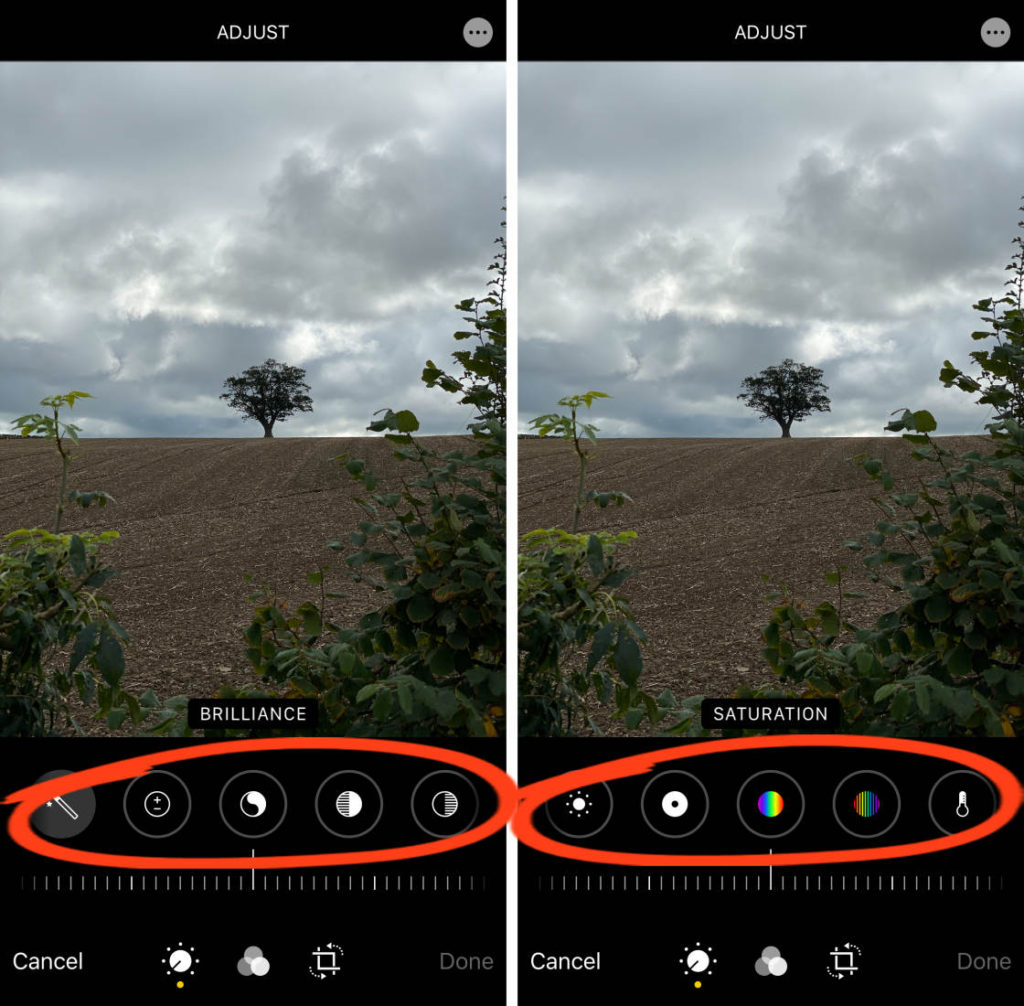
– In the iPhone photo editor, there are three icons at the bottom of the screen. Or if you’re editing a Live Photo, there will be four icons.
Adjustments
– To make adjustments to your photo, ensure the Adjust icon (dial) is selected at the bottom of the screen.
![]()
Beneath your photo, you’ll see a row of adjustment tools. Swipe across to see more tools.
Auto
The Auto tool automatically adjusts the colors and brightness levels in your photo.

Simply tap the Auto icon to apply this one-tap edit. The icon turns pale gray when it’s switched on.
You can use the slider at the bottom of the screen to adjust the strength of the edit.
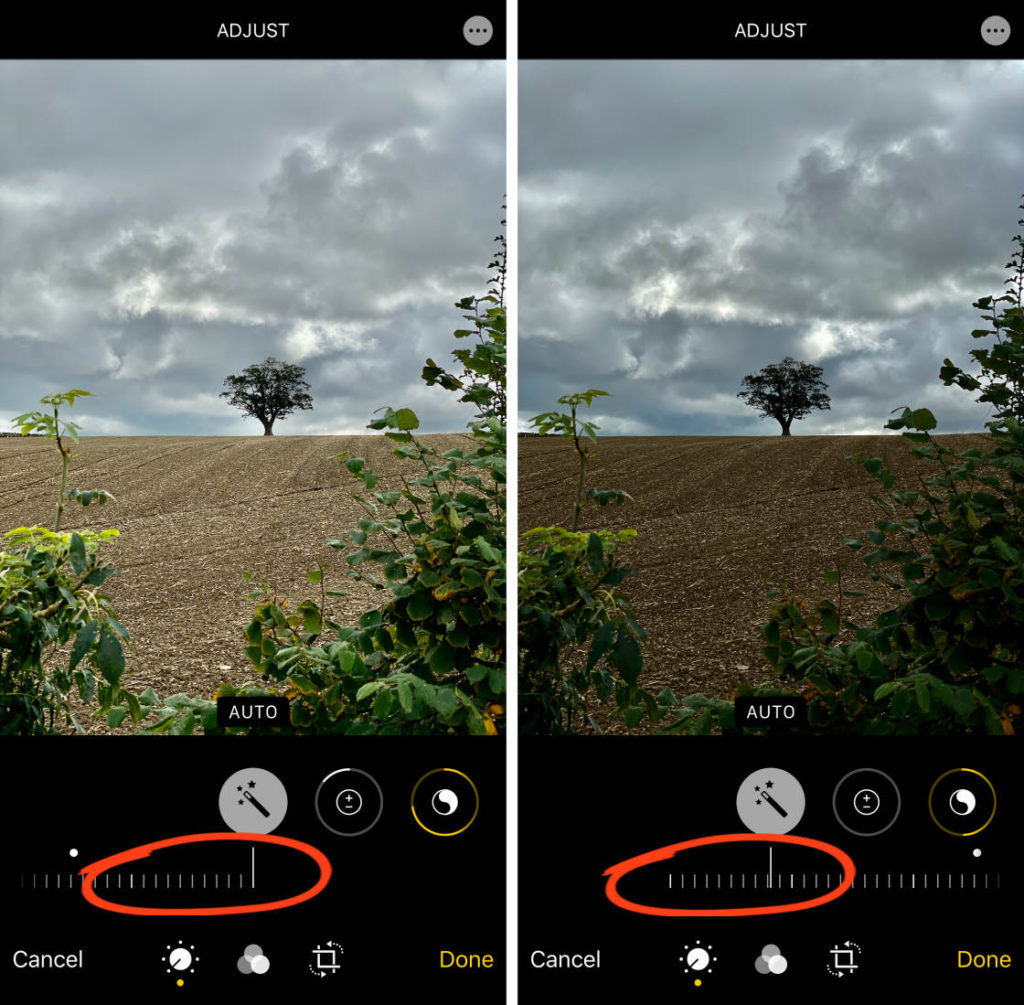
You can also adjust the individual edits that have been made to color, brightness, etc. If you swipe across the adjustment icons, a bold line indicates which tools the Auto adjustment has used.
Exposure

The Exposure tool brightens or darkens your photo.
Drag the slider right to brighten the image, or left to darken it.

The Exposure tool has more effect on the highlights than the shadows. This means that the bright tones in your photo are affected more than the dark tones.
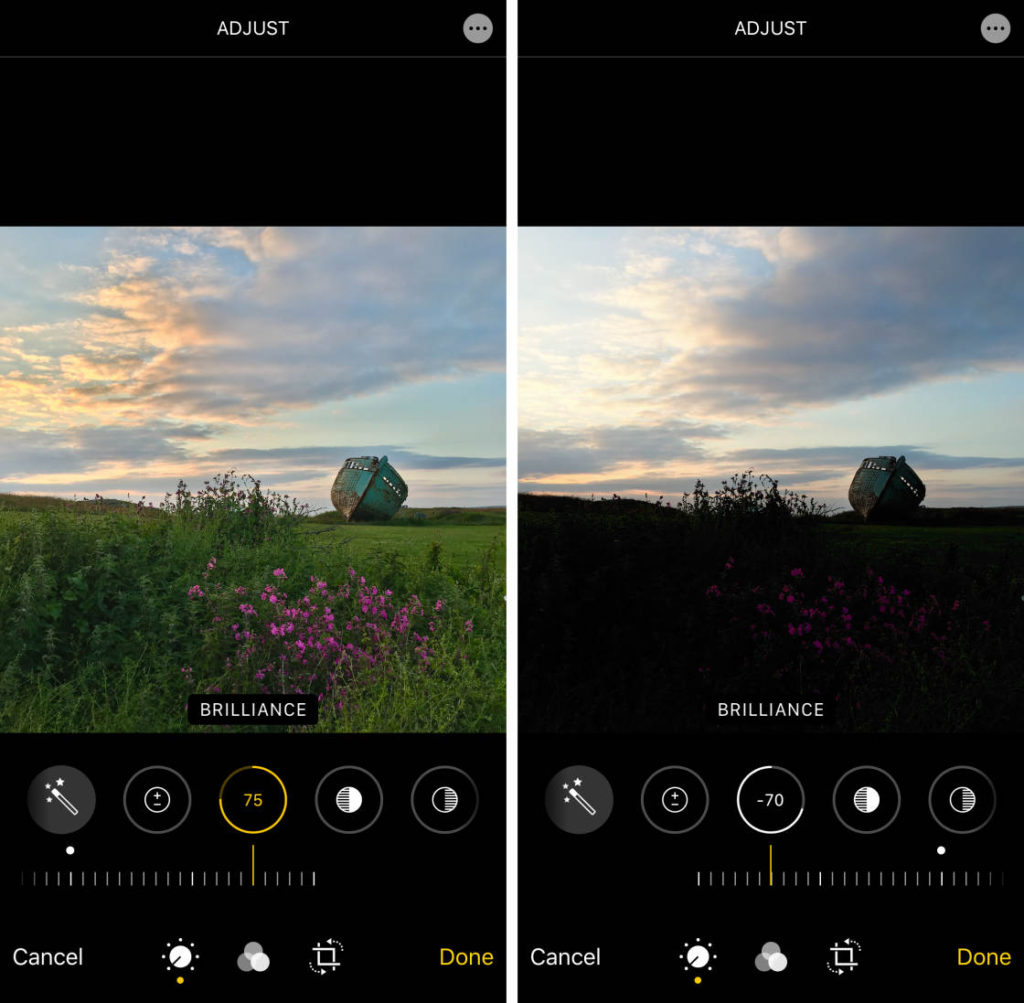
Brilliance
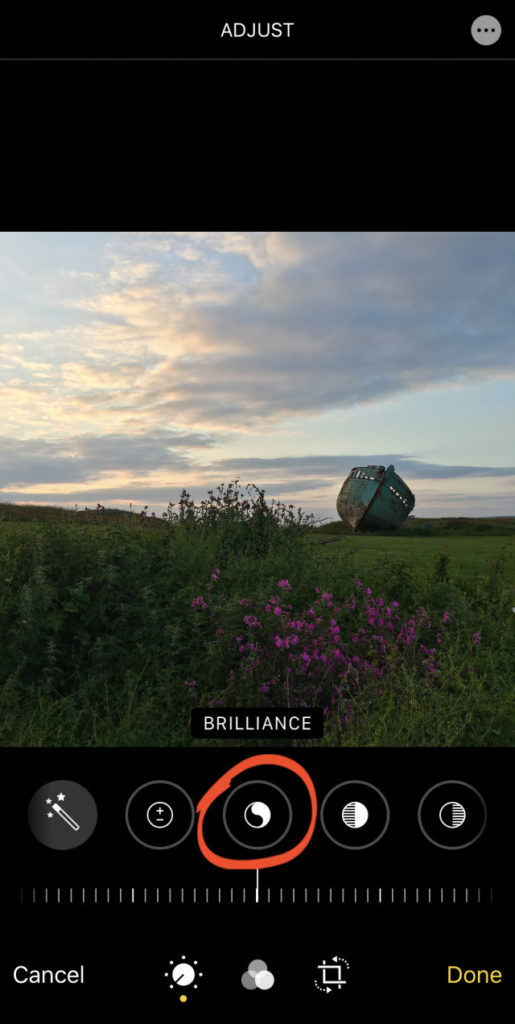
The Brilliance tool is great for bringing out details and making your photo look richer and more vibrant.
Drag the slider right to brighten shadows and darken highlights. If you drag left, the shadows will become darker and the highlights brighter.
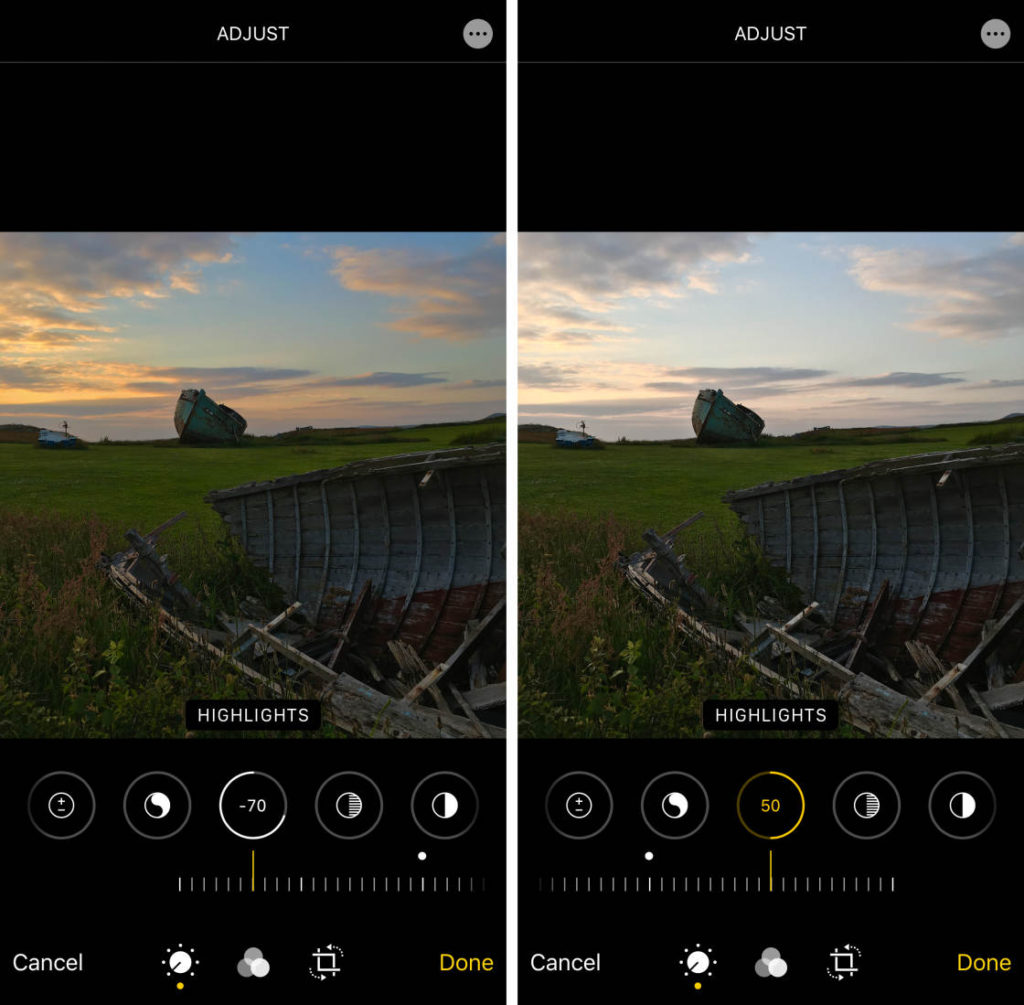
Highlights
The Highlights tool adjusts the brightness of only the bright areas in your photo.
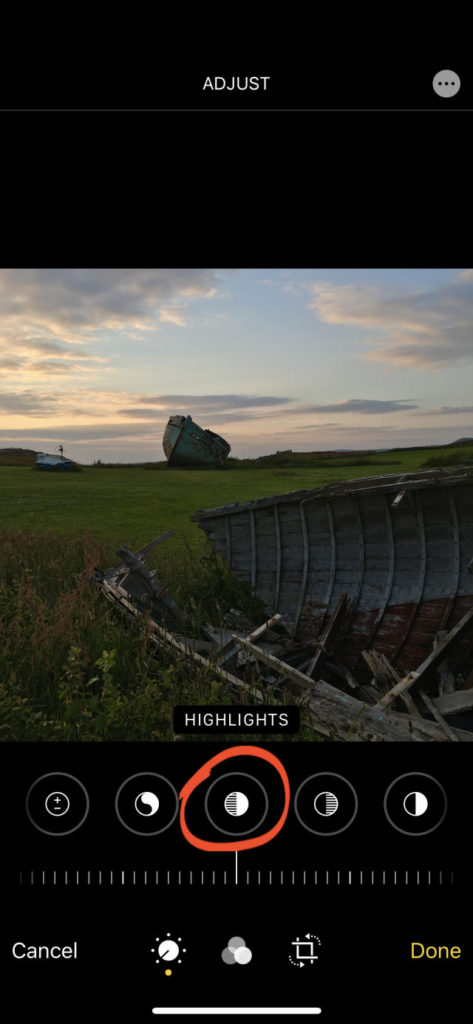
Drag the slider left to make the highlights darker, or right to make the highlights brighter.
Shadows
The Shadows tool adjusts the brightness of only the dark areas in your photo.
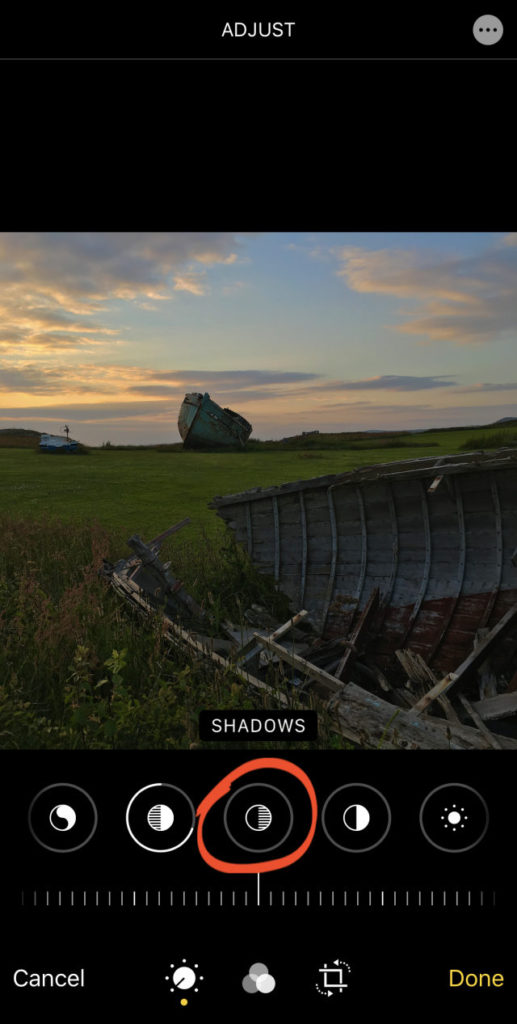
Drag the slider right to make the shadows brighter, or left to make them darker.
Contrast
The Contrast tool adjusts the contrast between the dark and bright tones in your photo.

Drag the slider right to increase contrast, making the shadows darker and the highlights brighter. Or drag left to reduce contrast, making the shadows and highlights more similar in tone.
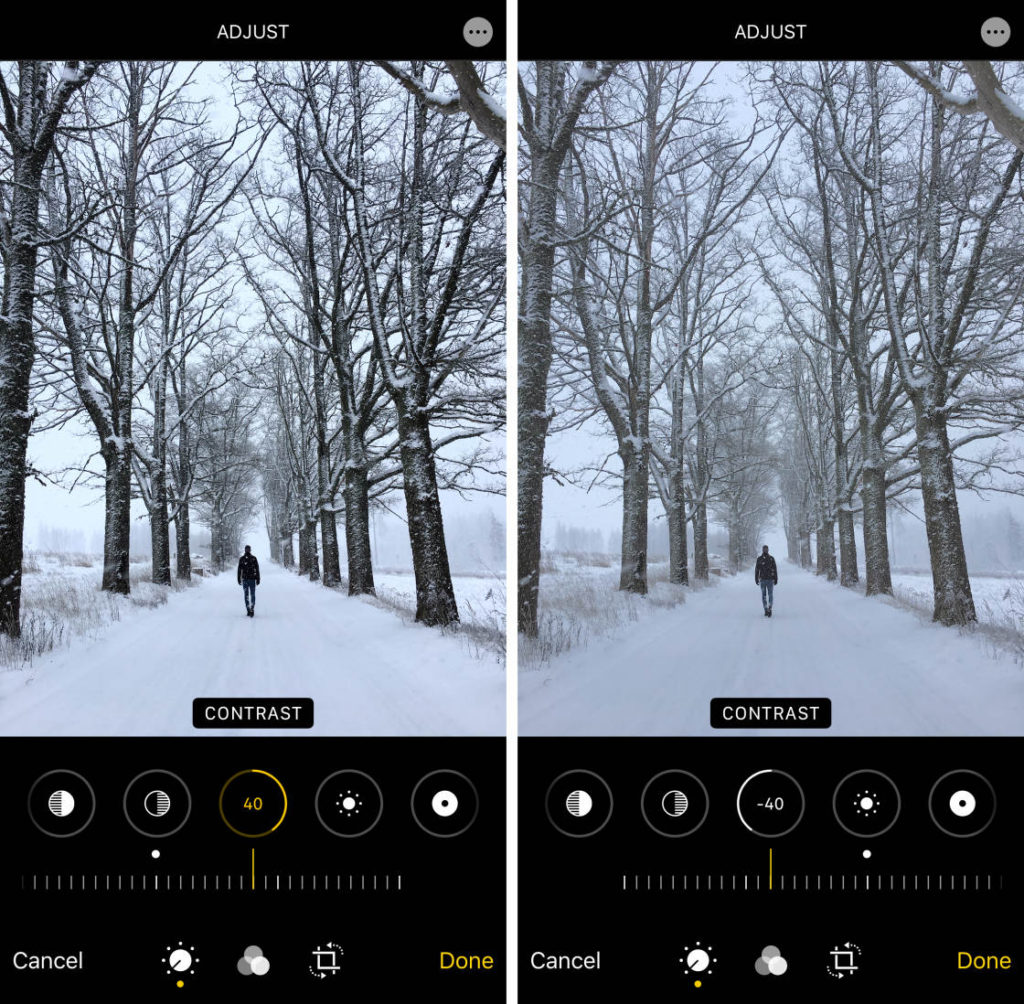
In most cases, reducing contrast doesn’t produce good results. Increasing the contrast a little can make your photo look sharper. However, you’ll often get better results with the Brilliance tool as it keeps the colors nice and vibrant.
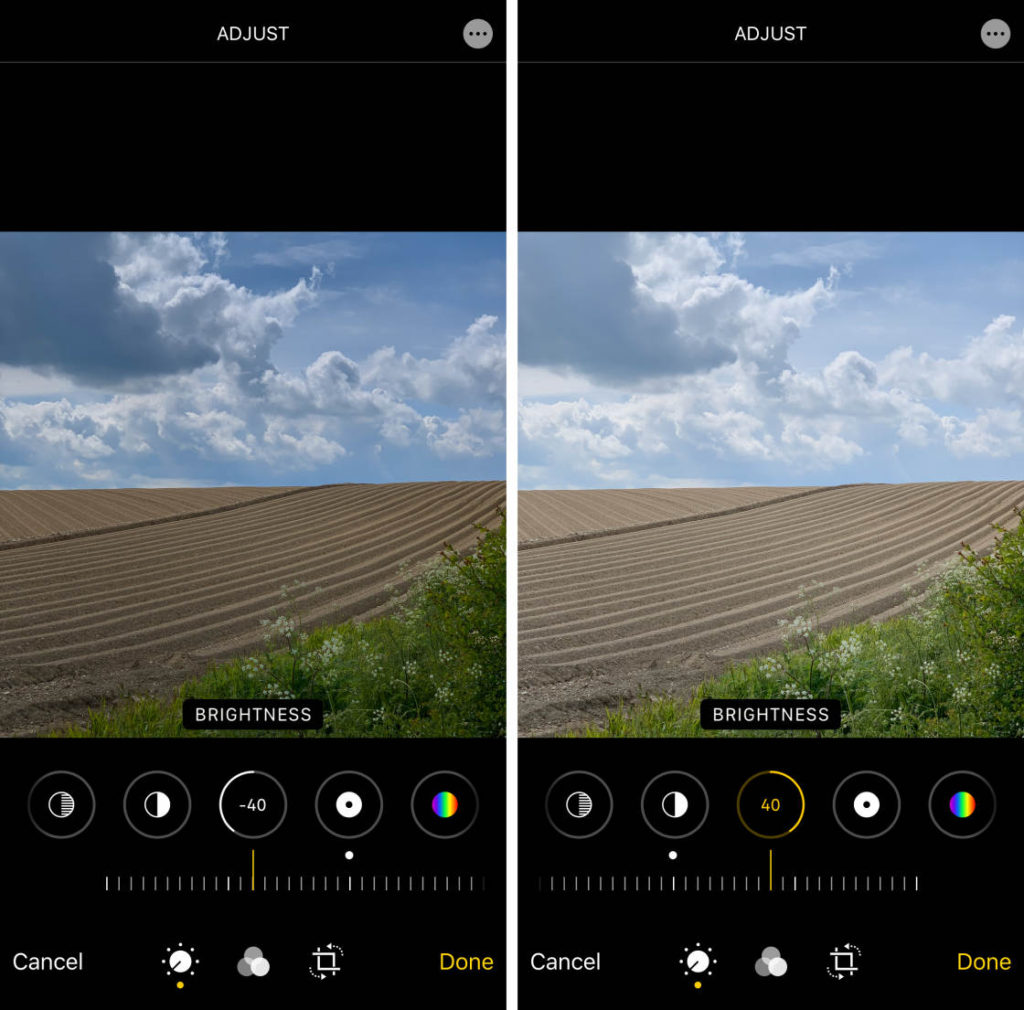
Brightness
The Brightness tool brightens or darkens your photo. But it does it in a slightly different (and usually better) way from the Exposure tool.
Drag the slider left to darken your photo, or right to brighten it.
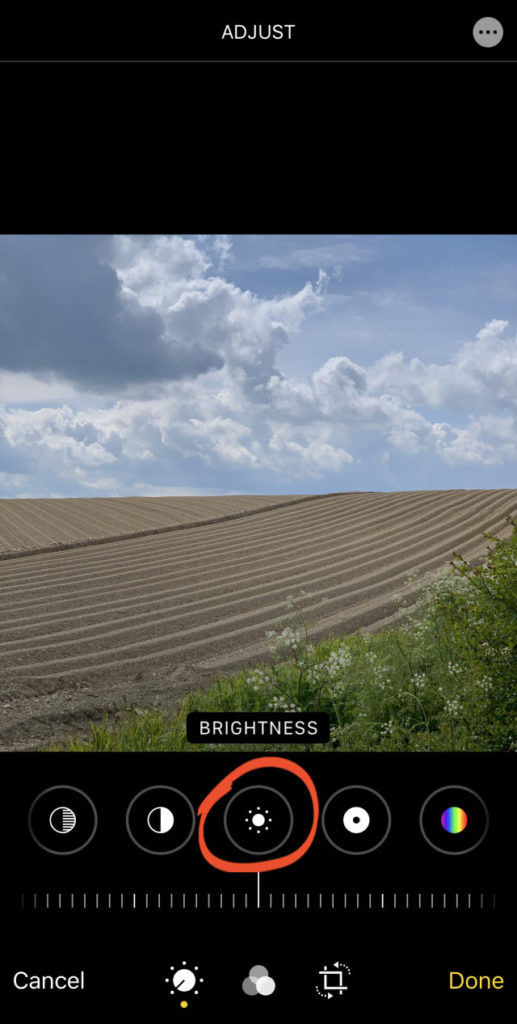
The Brightness tool has more effect on the shadows and midtones. This means the dark and medium tones get adjusted more than the bright tones.
Black Point
The Black Point tool affects the brightness of only the darkest tones in your photo.
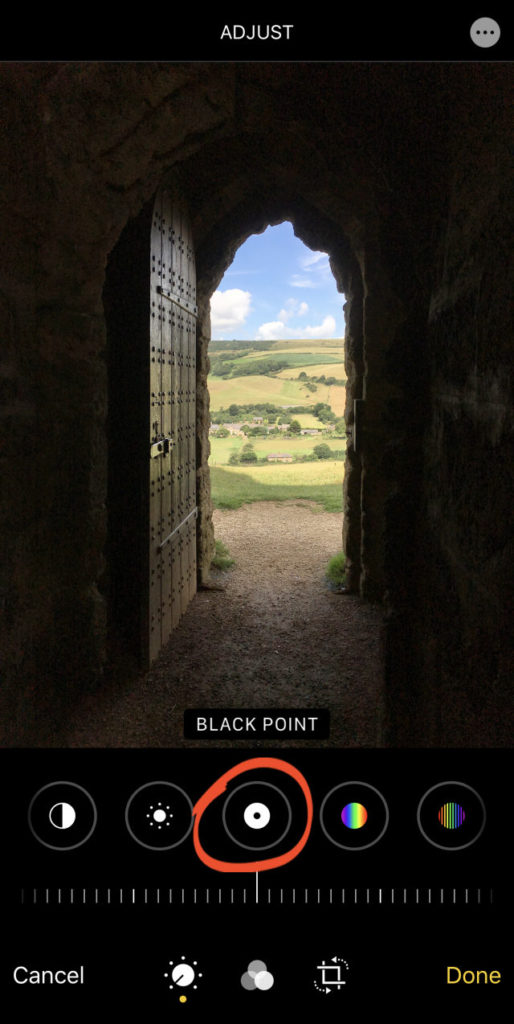
If your photo lacks rich black tones, drag the slider to the right to make the darkest areas appear black. Dragging to the left will make the dark areas appear faded.

Saturation
The Saturation tool makes the colors more vibrant or less vibrant.
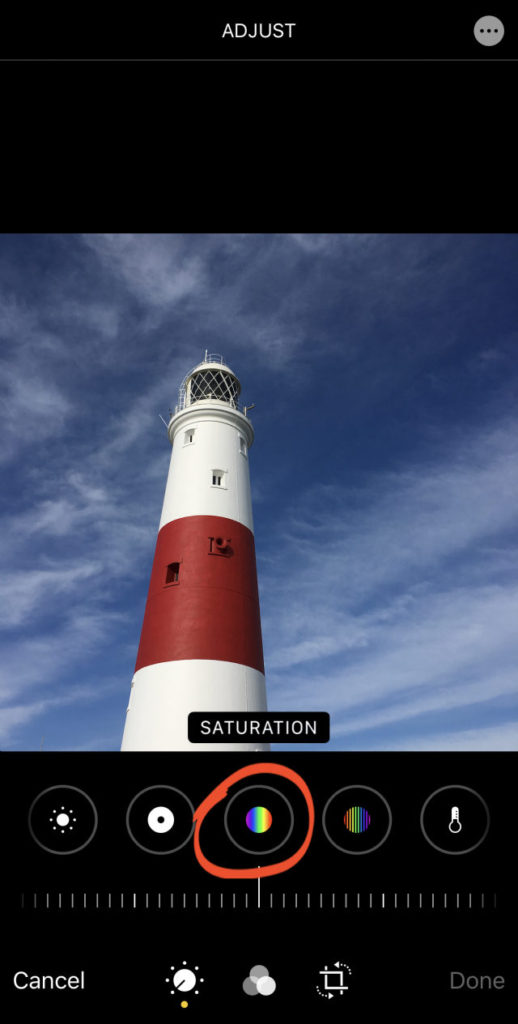
Drag the slider right to make the colors more vibrant, or left to make the colors more muted.

In most cases, increasing the saturation a little bit will make your image “pop.” But be careful not to over-saturate the colors. If you make the colors too vibrant, they won’t look natural.
To create a black and white photo, set the Saturation to -100.
Vibrance
The Vibrance tool makes muted colors more vibrant without affecting skin tones or saturated colors too much.

Drag the slider right to boost the vibrancy of muted colors. Or drag it left to reduce the vibrancy.
The Vibrance tool usually produces more natural-looking colors than the Saturation tool. This is because it doesn’t over-saturate skin tones or colors that are already vibrant.
Warmth
The Warmth tool makes the colors in your photo warmer or cooler.
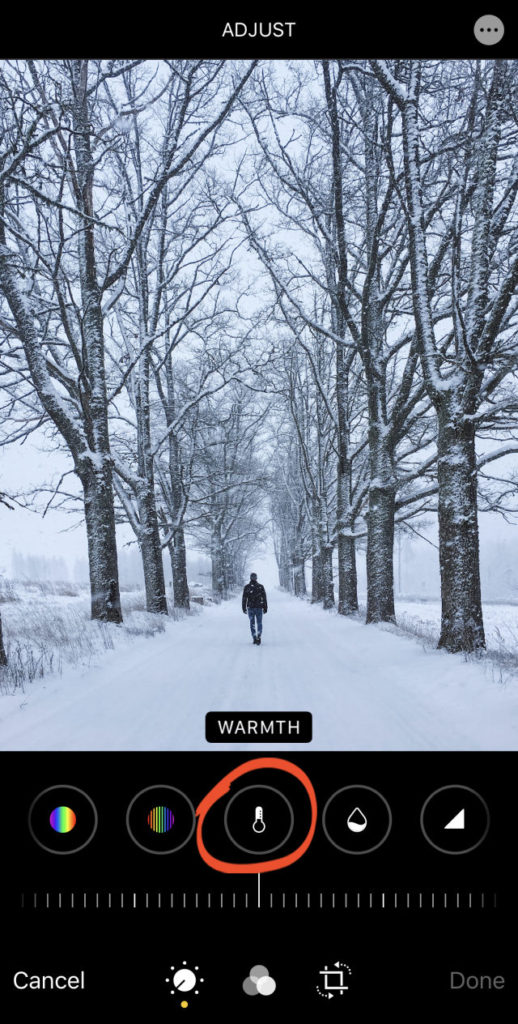
Drag the slider right to make the colors warmer (more orange). Or drag it left to make them cooler (more blue).
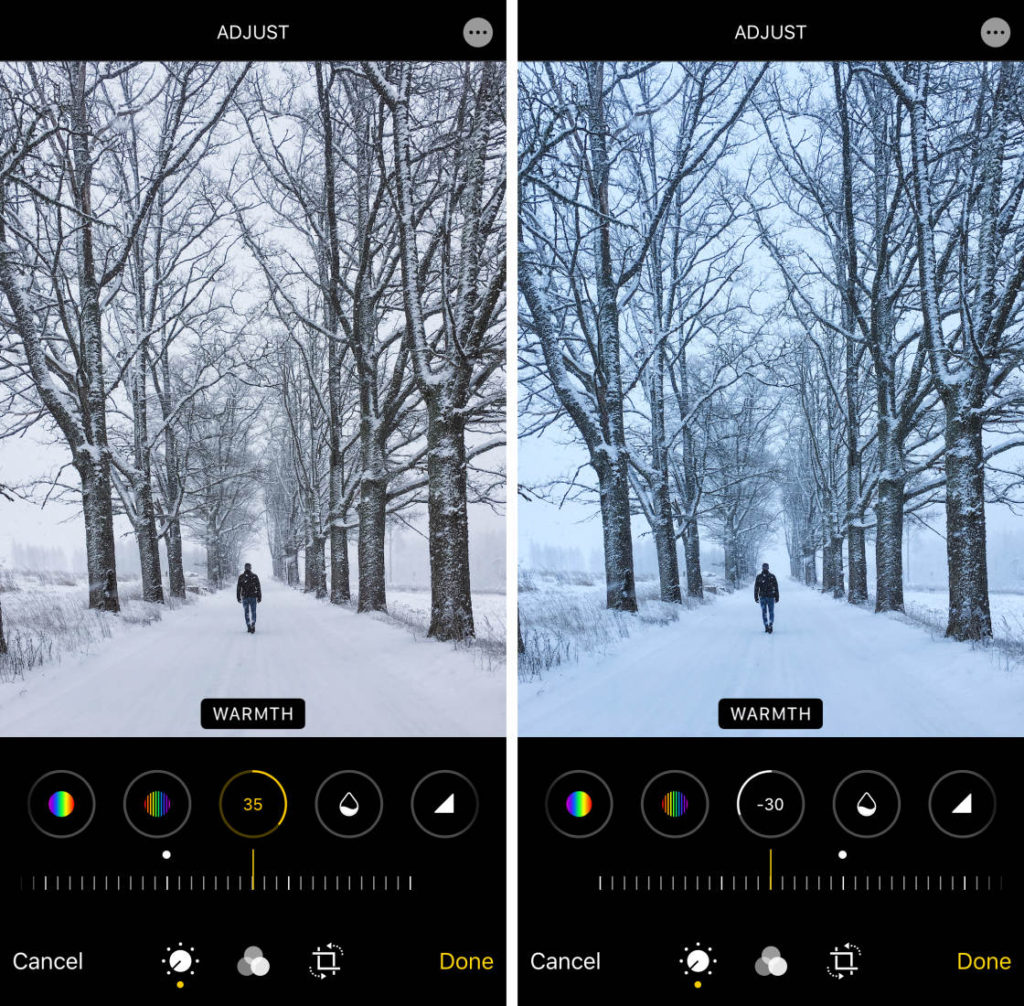
You can use the Warmth tool to correct the color balance of a photo. Or use it to change the overall mood of an image.
Tint
The Tint tool allows you to add a green or magenta color tint to your photo.
Drag the slider left to add a green tint, or right to add a magenta tint.
The green tint is great for increasing the vibrancy of green leaves or fields. Just be aware that it tints the entire photo, so all colors will be affected.
Sharpness
The Sharpness tool sharpens detail in your photo by making edges crisper and more defined.
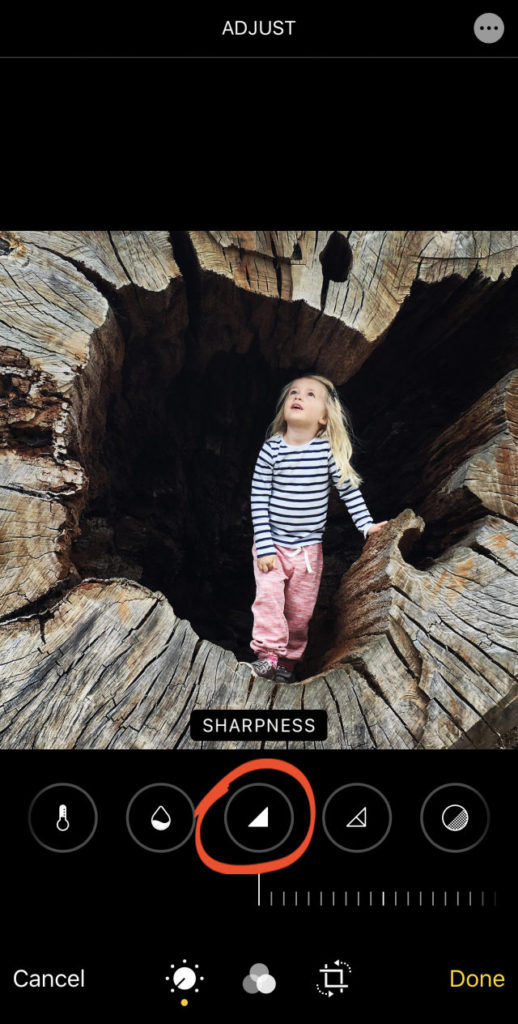
Drag the slider right to make the image sharper.
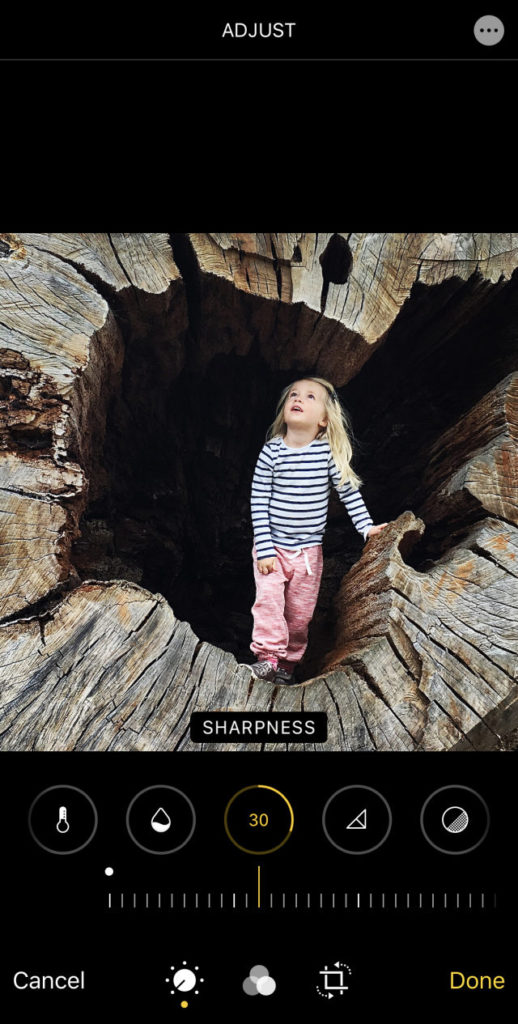
Be careful not to increase sharpness too much. Over-sharpening will reduce the image quality.
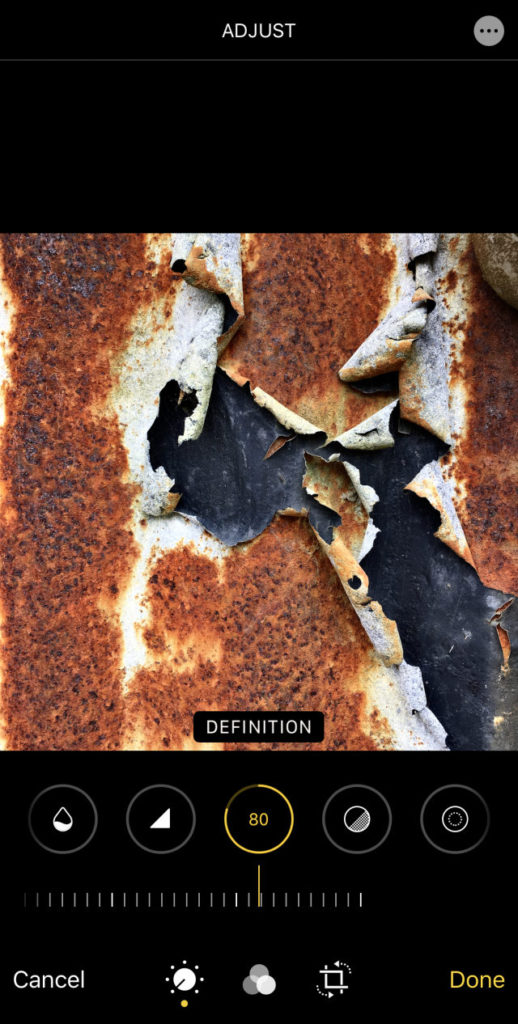
Definition
The Definition tool adjusts contrast to improve the clarity of detail in your photo.
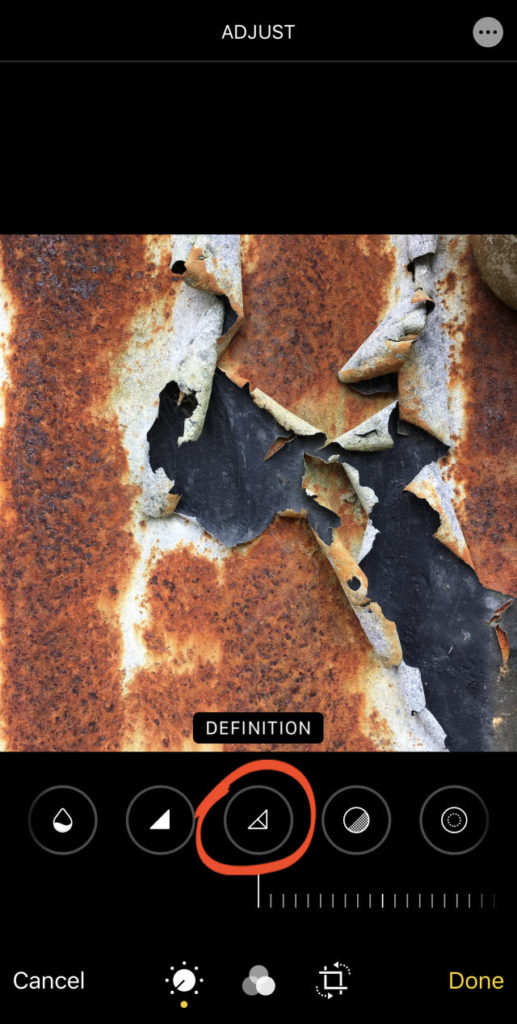
Drag the slider right to increase clarity and definition in your image.
Noise Reduction
The Noise Reduction tool reduces “digital noise” – such as grain caused by shooting in low light. You can also get grain in your photos when editing, e.g., if you brighten the shadows too much.
If you have a grainy or “noisy” photo, drag the slider right to reduce the noise.
Use this tool sparingly as too much noise reduction will soften the detail in your photo.
Vignette
The Vignette tool darkens or brightens the edges of your photo.
Drag the slider right to add a dark vignette, or left to add a bright vignette. A dark vignette usually looks better than a bright one.
Use A Filter To Adjust The Color Tone
Filters offer a quick and easy way to change the look and feel of your photo.
With a single tap, you can adjust the color tone of your image using a range of color and black and white filters.
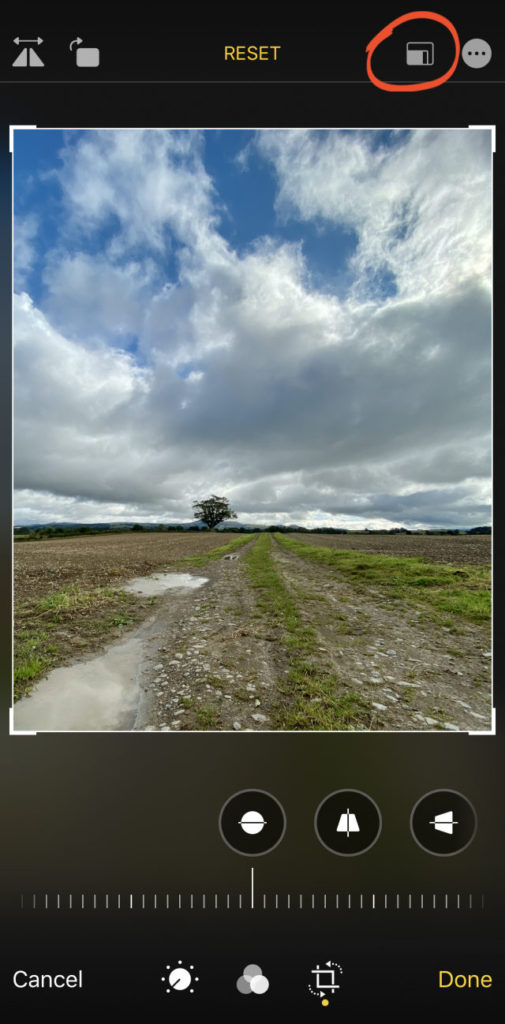
Crop, Rotate, Straighten & Adjust Perspective
The Photos app has a range of tools for cropping, rotating, straightening, and adjusting perspective.
To access these tools, tap the Crop icon at the bottom of the screen.

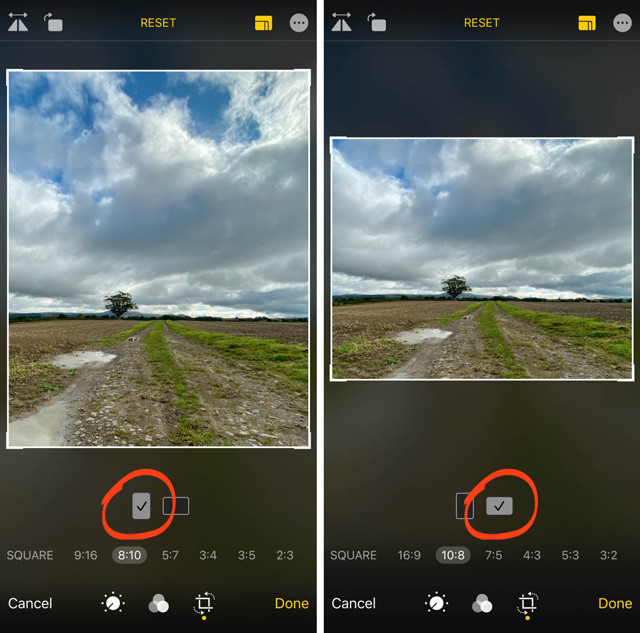
You can crop with preset dimensions.

Auto Crop & Straighten
![]()
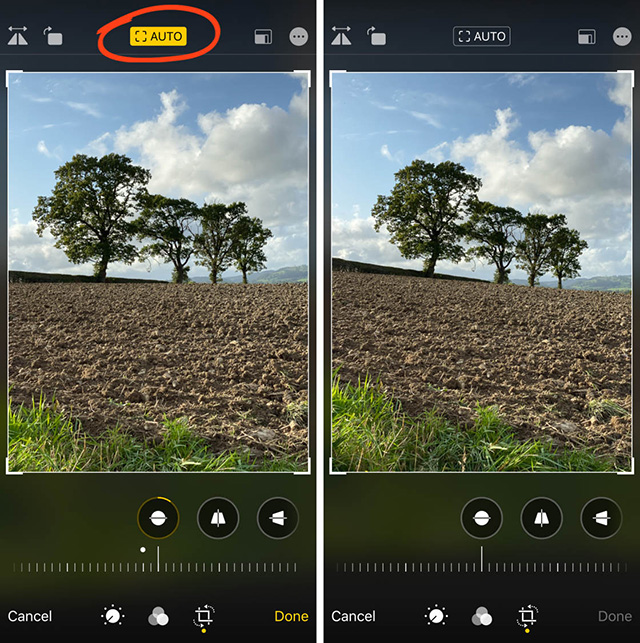
When you first open the Crop options, you might notice that your image is automatically straightened and/or cropped.
If your iPhone has applied Auto cropping or straightening, you’ll see AUTO in yellow at the top of the screen. If you don’t want to accept these automatic adjustments, tap the yellow AUTO icon.
Straighten
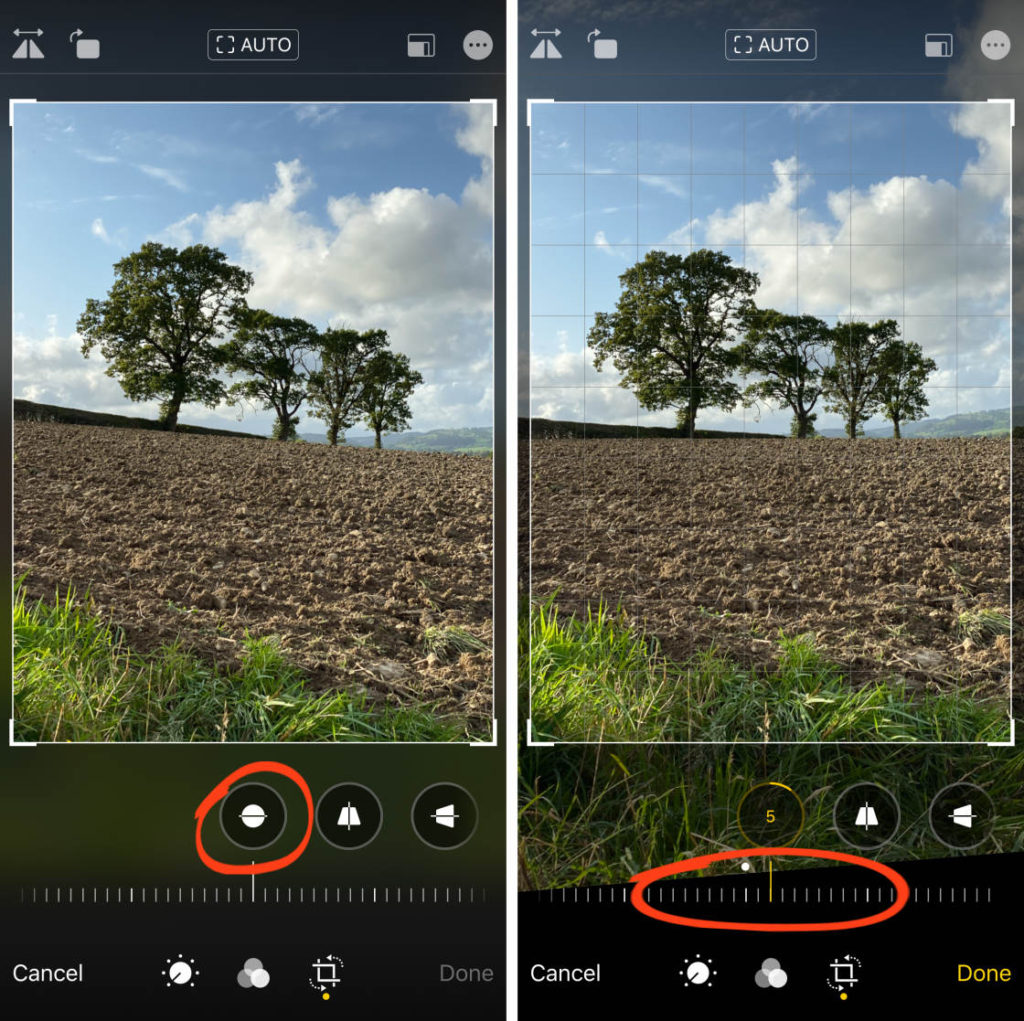
If your photo doesn’t look level, you can easily straighten it in the Photos app.
Tap the Straighten tool beneath the image. Then drag the slider to rotate and straighten the photo. Use the gridlines to help you get the photo perfectly level.
Undo Edits
To revert to the original photo, click on edit, then tap Revert at the bottom right. Then tap Revert To Original.
Source:
iPhone Photography School
Other iPhone Tips