Timelines
Using Timelines in Stories: Chronology, Context, Clarification, Cause-and-Effect, Patterns/Trends, Retrospective/Biography, Navigation
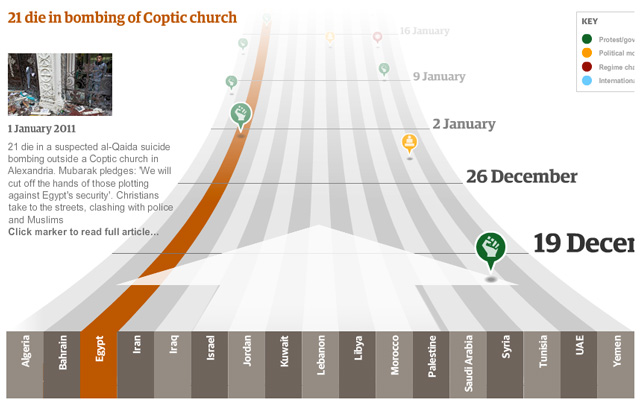
– Chronology: Describing a series of events minute by minute, day by day, year by year
– Clarification: Making complex or ongoing issues easier to understand
– Context: How does the current event fit into a bigger picture?
– Cause and effect: What series of smaller events has led to this big news story?
– Patterns/Trends/Turning Point: Using past events to show larger patterns or what the future might hold.
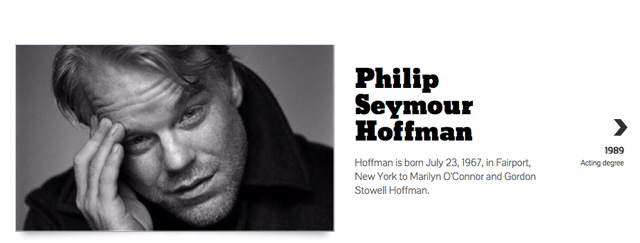
– Retrospective/Biography: Plotting the milestones of a life.
– Navigation: Using time as a device for navigating a narrative.
Process
Should I include a timeline in my story?
– Does your story contain a complex series of events that might be better told through a timeline?
– Is there a compelling historical component to your piece?
– Are there key milestones that will show how past events have caused or led to this event?
– Are you doing a profile where a retrospective timeline is appropriate?
– Is the future of an issue the point of your story and would a timeline help suggest trends, future directions?
– Will putting your reporting in a timeline help you explore the issue or help you structure the piece?
– What is the goal of my timeline? Is it complementary or redundant?
– What is the logical breakdown of my timeline: days, weeks, years?
Tools

Tool 1: TimelineJS
– It has built in support for: Twitter, Flickr, Google Maps, YouTube, Vimeo, Wikipedia, and SoundCloud.
– Pick stories that have a strong chronological narrative. It does not work well for stories that need to jump around in the timeline.
– Keep it short, and write each event as a part of a larger narrative.
– Include events that build up to major occurrences. Not just the major events.
Steps:
1) Copy the Google Template You must be logged into Google Docs. At the top of the template you will see a button that says “Use the template.” Click it.
2) Populate the designated fields: date, headline, text, media, media credit, media caption

Note:
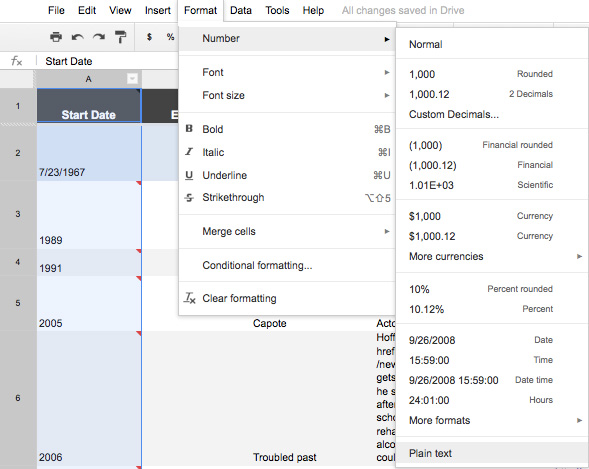
– Start date is required, though you can remove End Date. The default is month/day/year. However, you can just use the year, or the month/year. Go to Format> Number > Plain Text
– Headline is required. It will be a header and also show on the arrows for the next slide
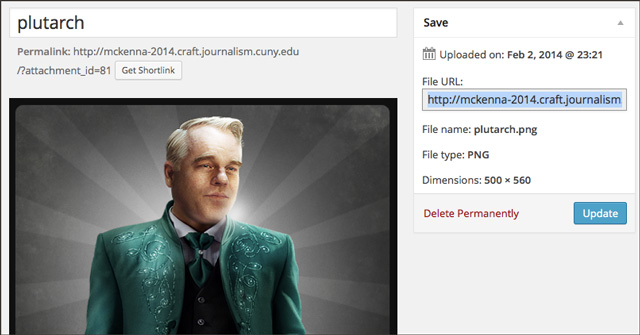
– Media requires a URL. Generally the link, rather than the embed code, is best. For images, it is the simple URL for the direct link to the image. You should upload your images to flickr or to your blog and use that URL. For Youtube, Soundcloud, Twitter, Google maps, again, you can use the URL.
– Media credits will appear directly below the media in the lower-right-hand corner and captions will appear beneath that.
– If you use the Media thumbnail option it should be no larger than 32px x 32px.
3) Once you are done populating the fields, go to File > Share > Make Public
4) Next go to File > Publish to Web
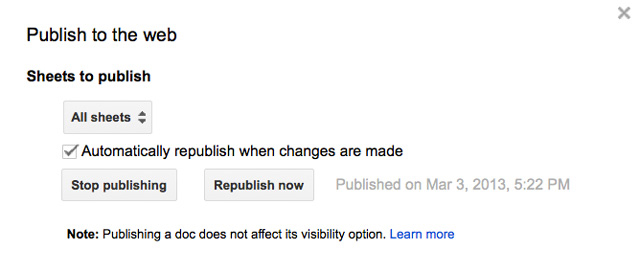
5) Make sure it says “Republish when changes are made.” Ignore where it says Get a link to the published data. This no longer works. Instead, grab the URL at the top of the Google spreadsheet.
6) Go to TimelineJS, paste in the Google timeline URL and click “Preview to make sure the timeline is functioning as it should.
7) Once you have tweaked your timeline to your satisfaction, get the embed code using the embed generator.
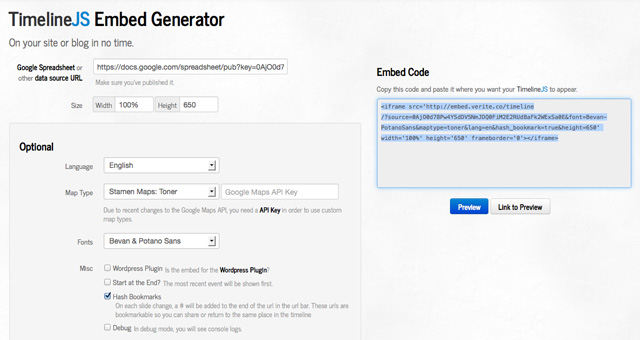
8) Take the <iframe> code that should look something like the below and paste it into the text mode of your WP blog.
<iframe src=’http://cdn.knightlab.com/libs/timeline/latest/embed/index.html?source=0AjO0d78Pw4YSdHB1WVhzb2U1ZE54UzNhZWFZdGVUVVE&font=Bevan-PotanoSans&maptype=TERRAIN&lang=en&height=650′ width=’100%’ height=’650′ frameborder=’0′></iframe>